Presets Functionality
The presets functionality enables you to save and recall study parameter settings, including ephemerides, celestial body selections, tables of aspects, hotspots, arcs, and filter scripts. The presets menu is opened via the same presets button for all preset types except the body selections. To open the presets menu for body selections, right-click on any body name in the list of bodies.
Adding a Preset
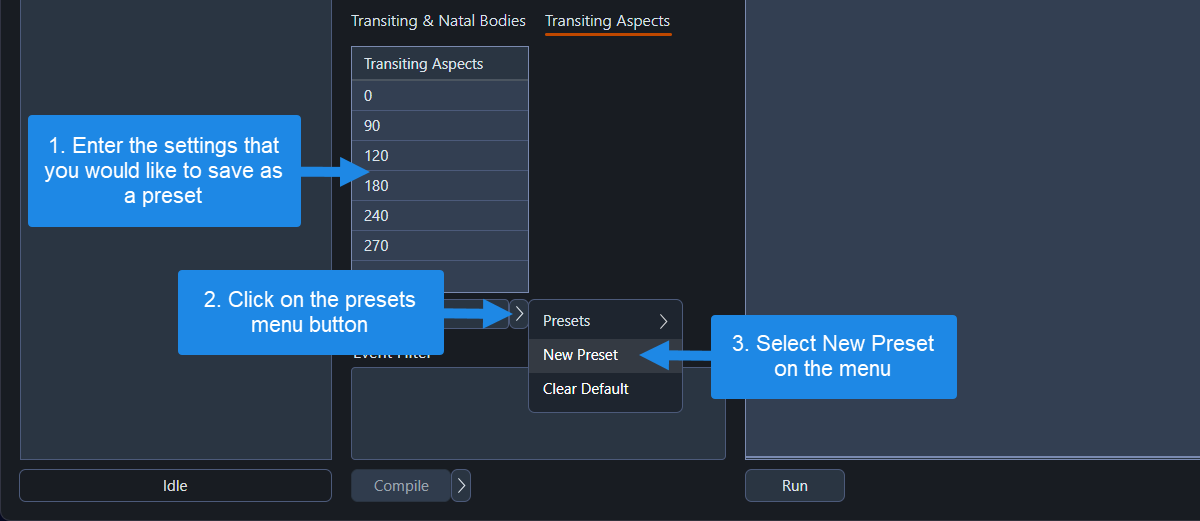
Here's how to add a new preset (save the current settings as a preset):
- Input the settings you want to save as a preset
- Click the presets menu button
- Select
New Presetfrom the menu - Type in a name for the new preset when prompted
 Adding a new aspects preset
Applying a Preset
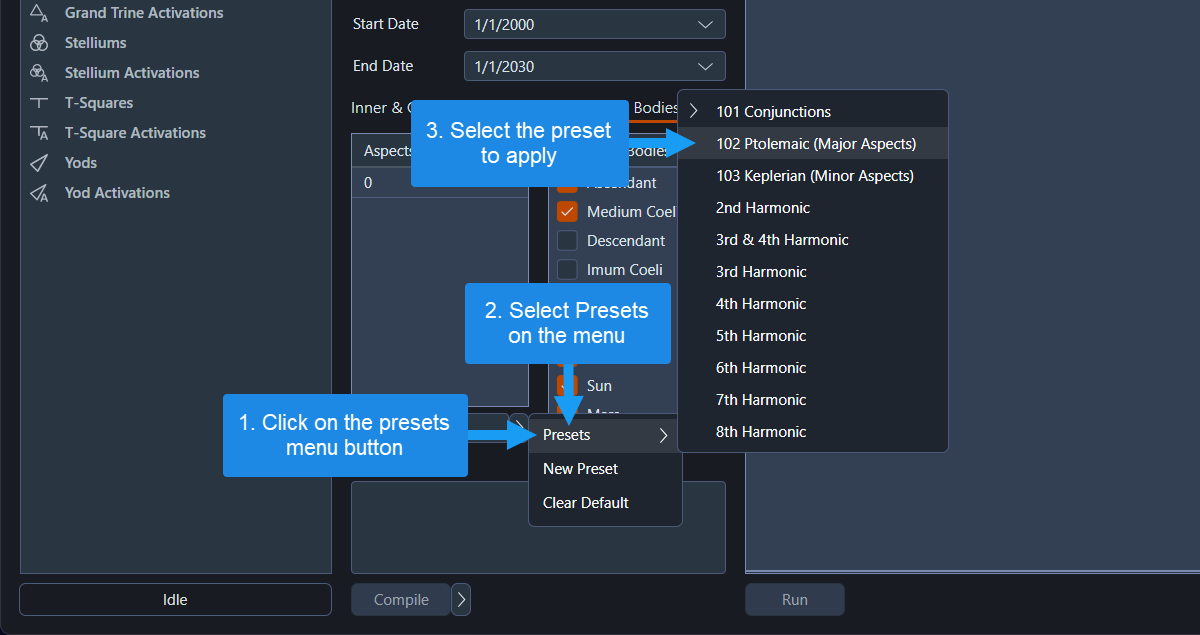
To use settings you've previously saved as a preset, follow these steps:
- Click the presets menu button
- Select the
Presetsoption from the menu - Click the name of the preset you want to apply
 Applying a preset
Assigning the Default Preset
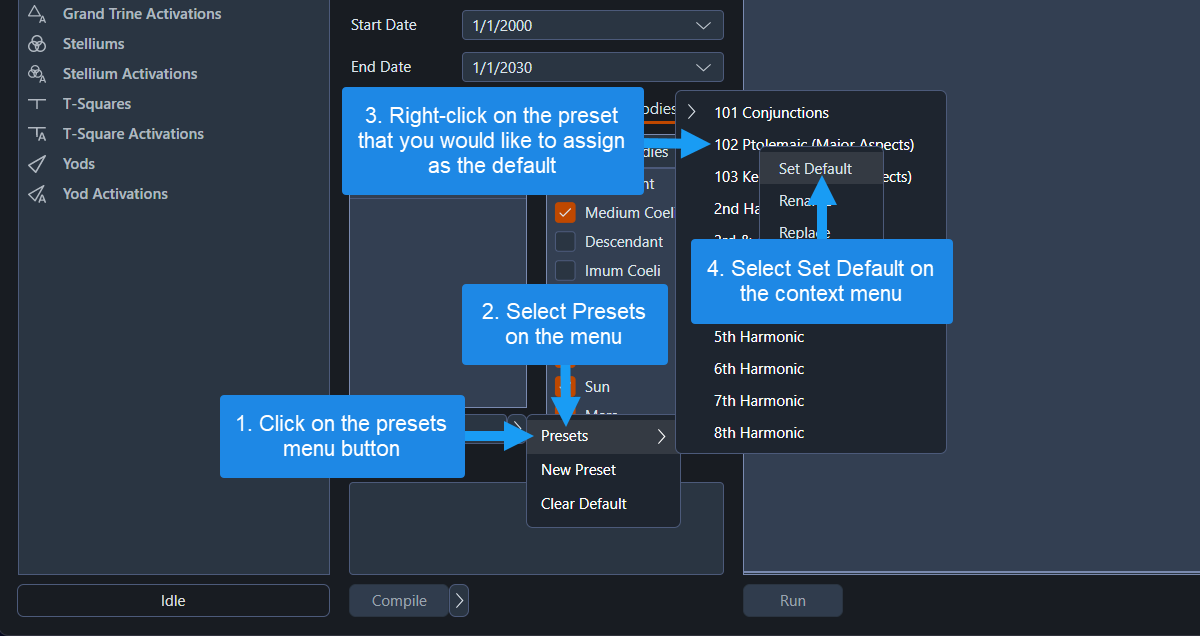
If you've set a default preset, it will be automatically applied when you create a new workspace or study. To assign a default preset, follow these steps:
- Click the presets menu button
- Choose the
Presetsoption from the menu - Right-click on the preset you want to make the default, and select
Set Defaultfrom the context menu
 Assigning the default preset
Presets can also be renamed, replaced, or deleted using the context menu that opens when a preset is right-clicked.