Adding and Editing Natal Records
When adding or editing the location for a natal record, Aquila's precision timekeeping system uses the latitude and longitude to do the work for you. Enter the coordinates, and the correct local time zone, along with any historical Daylight Saving Time rules, will be automatically applied for any date, anywhere in the world. This is handled by a professional-grade global time zone atlas built into the application.
Opening the Natal Records Editor
To open the Natal Records Editor, go to the main menu and choose Edit followed by Natal Records.
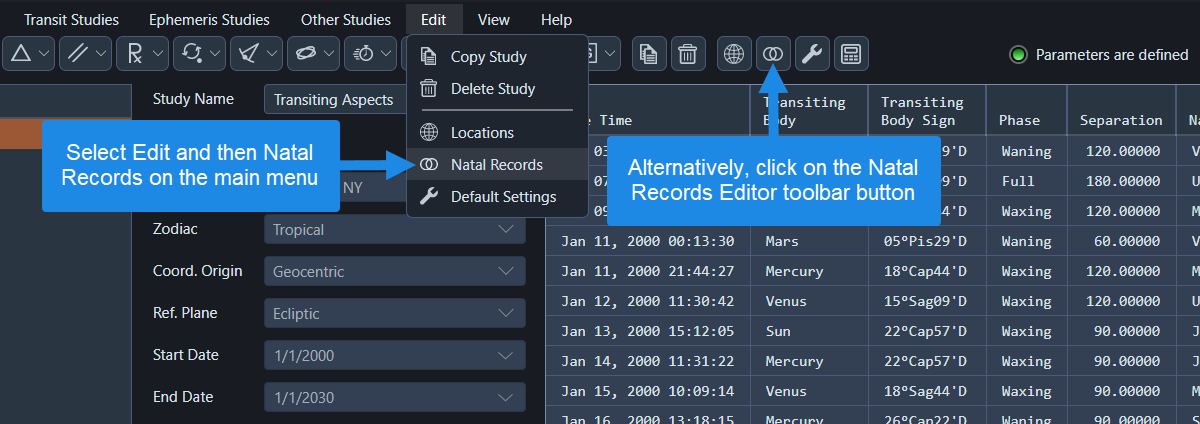 Opening the Natal Records editor
Managing Natal Records
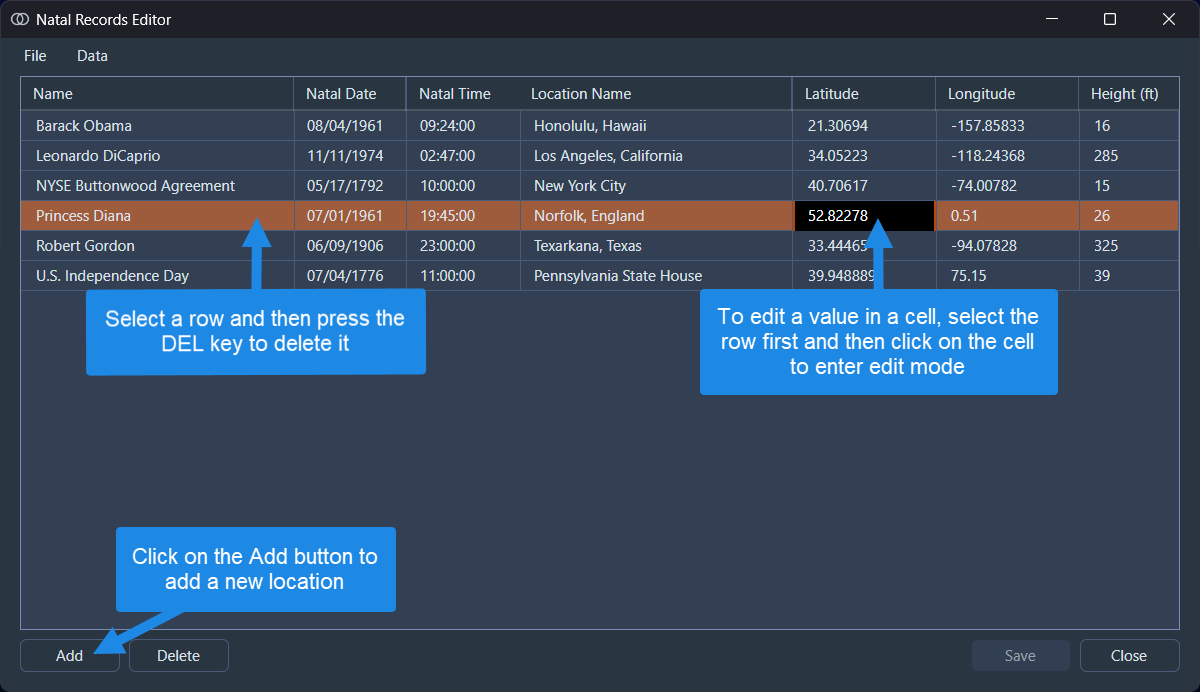
You can manage the natal records in the table as follows:
- Add a Natal Record: Click the
Addbutton or click on the last row to select it and then click in the right-most cell of that row to enter edit mode before pressing theTABkey
 Adding and editing natal records
-
Edit a Natal Record: To edit a natal record, click on the row that it occupies to select the row and then click in the cell that contains the value you want to change. The second click puts the table into edit mode. To apply your edits and exit edit mode, press the
Enterkey or press theESCkey to cancel cell edits -
Delete a Natal Record: To delete a natal record, select the row(s) you want to remove and press the
DELkey on your keyboard. If the table is in edit mode then exit edit mode before attempting to delete the row
Importing Natal Records from CSV
You can import natal records from a CSV file to quickly add multiple records:
- In the Natal Records Editor, select
Datafrom the main menu - Select
Importfrom the menu - Browse to and select your CSV file
- Click
Opento import the records
CSV Format Requirements
The CSV file must contain the following six columns in this exact order:
| Column | Description | Format | Example |
|---|---|---|---|
| Name | Person's name | Text (quoted) | "Robert Gordon" |
| Natal Date | Birth date and time | yyyy-MM-dd HH:mm:ss | 2023-06-10 14:30:00 |
| Location Name | Place name | Text (quoted) | "New York, NY" |
| Latitude | Latitude in degrees | Decimal number | 40.7128 |
| Longitude | Longitude in degrees | Decimal number | -74.0060 |
| Height | Height above sea level in feet | Decimal number | 33 |
Important notes:
- The CSV file may optionally include a header row with column names. Aquila automatically detects whether a header is present
- Text fields (Name and Location Name) should be enclosed in double quotes
- Dates must be in local civil time with the format
yyyy-MM-dd HH:mm:ss(e.g.,1906-06-10 14:30:00for 2:30 PM local time) - The date/time represents the actual time as it was recorded locally, not UTC
- Latitude uses positive values for North, negative for South
- Longitude uses positive values for East, negative for West
- Height is in feet above sea level
- The timezone is automatically determined from the latitude and longitude coordinates
Example CSV with header:
Name,Natal Date,Location Name,Latitude,Longitude,Height
"Robert Gordon","1906-06-10 14:30:00","Texarkana, Texas",33.425511,-94.047764,285
"Marie Curie","1867-11-07 12:00:00","Warsaw, Poland",52.2297,21.0122,350
Example CSV without header:
"Robert Gordon","1906-06-10 14:30:00","Texarkana, Texas",33.425511,-94.047764,285
"Marie Curie","1867-11-07 12:00:00","Warsaw, Poland",52.2297,21.0122,350
Exporting Natal Records to CSV
You can export natal records to a CSV file for backup or use in other applications:
- In the Natal Records Editor, select
Datafrom the main menu - Select
Exportfrom the menu - Choose a location and filename for the CSV file
- Click
Saveto export the records
The exported CSV file will include a header row and follow the same format described above, making it compatible for re-importing later.